Sunday, February 9, 2014

Gold and Blue Girl's Dress


Hello My Blogger Friends, I am back to blogging after a long time. Sorry for the long absence. Life takes turns ans twists but here I am. I could not be happier to present my newest project. It is my first take on sewing in a very long time and certainly my first baby girl dress. 


Above are the 2 types of fabrics that I used. The golden fabric was leftover from another project and the till color was matched. I had all the fabric used in this project in hand from before. So I did not spend any money. 


Above is the picture of front body. This was a leftover solid fabric from another project. I used embroidered net fabric for the vertical design. 

I did not use any commercial pattern for this project. I drafted one by hand. 


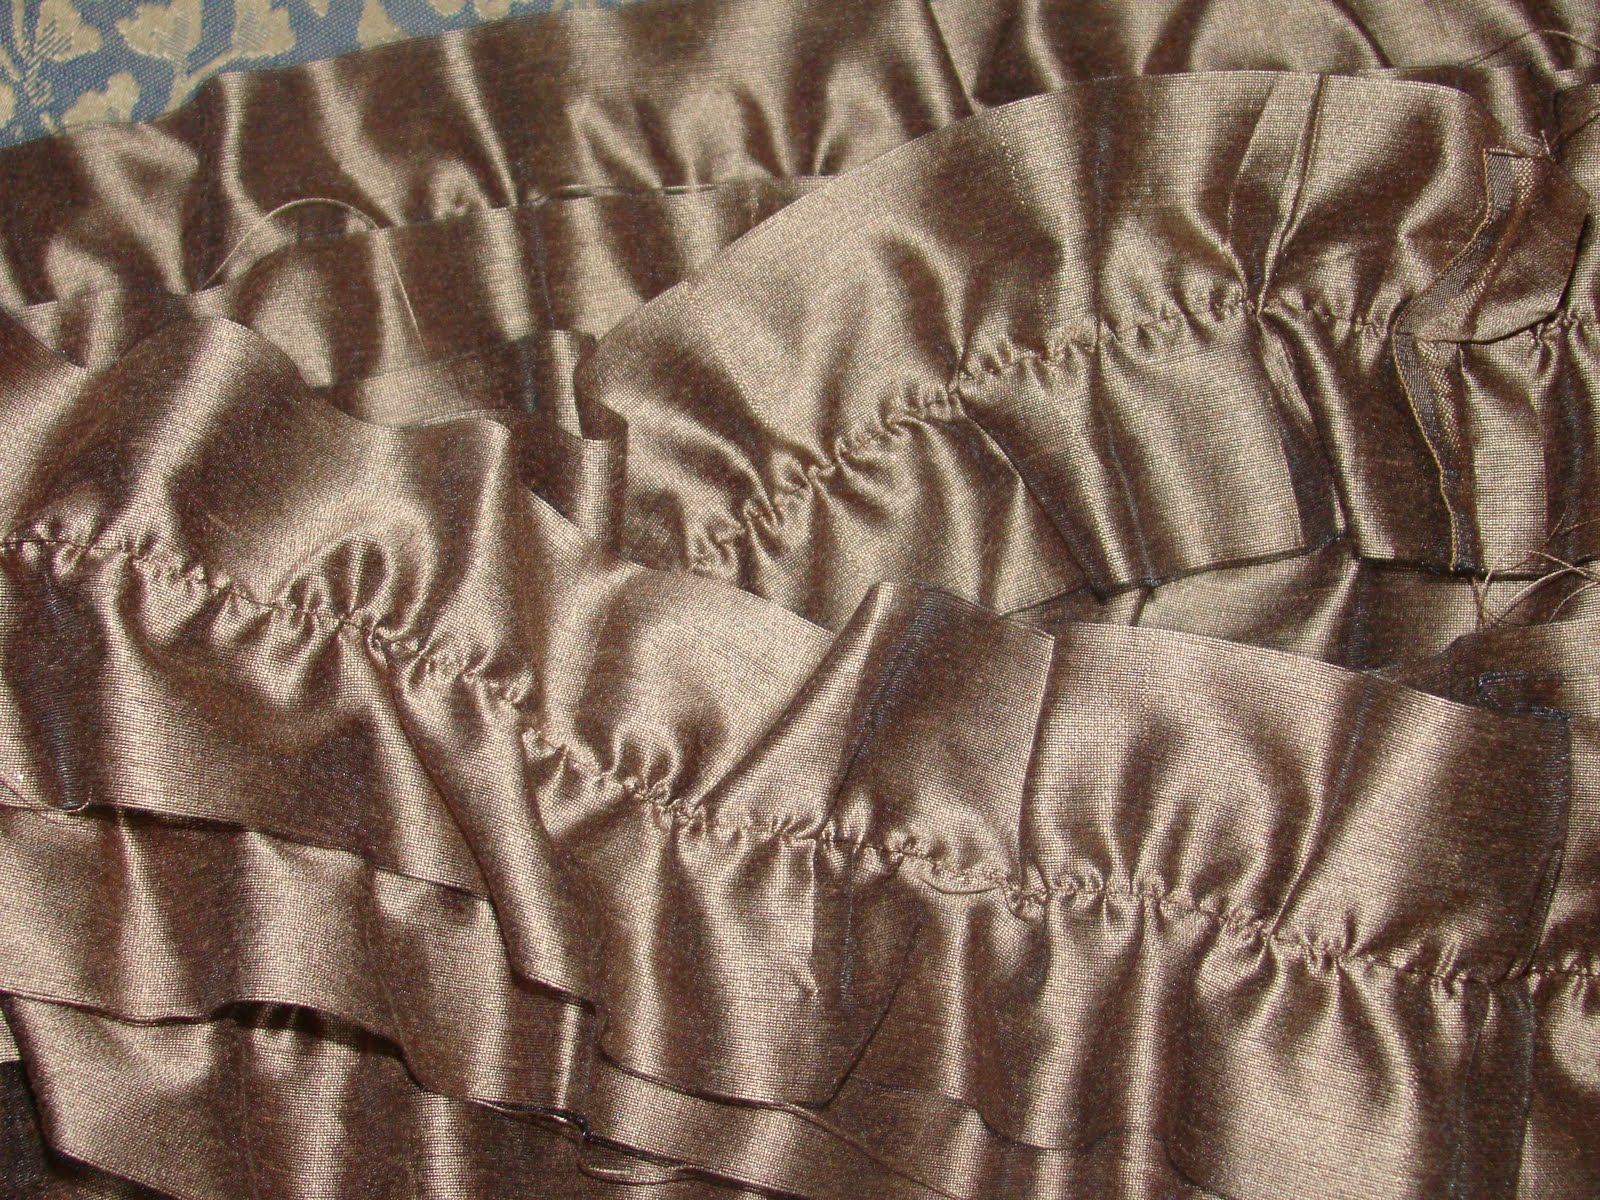
Above picture the body belt design have been shown. this technique is fairly easy. As you can see using pins I have secured the random pleats. Then I stitched over to secured them permanently. 


Here above picture is showing all the pieces before being put together as a dress. As you can see I have pre-pleated the bottom half of the dress for convienance. also the till colored borders were pre-prepared. 


Here you can see the compleated dress. Pleats were ironed carefully for even look. 

Linl Parties:

By Stephanie Lynn  
The Girl Creative
Photobucket

Thursday, May 26, 2011

Playing WIth Lace and Ribbons

Recently I bought a good amount of lace and ribbons. I did not have any particular project in mind.Yet I bought a significant amount anyways.  When a project comes along making a trip to the store does not happen often. In my process of organizing and storing them I came up with this design. This design is very easy and simple because all I did was, sew them in each row. I am happy with the result. It is easy and simple but looks elegant.


This is how it looks


These are what I used to make the design

So all my readers out there if you do not have a sewing machine, there is no need to be afraid because can be done by hand stitch. If hand stitched I believe it will not be very time consuming .

If any questions please let me know.


UndertheTableandDreaming

Saturday, May 21, 2011

Crib Fitted Sheet Tutorial

During this week I made the fitted mattress cover and matching pillowcase for my boys crib. It turned out well.
Please see the pictures and tutorial bellow.

Side view of the crib

                                       
View from the top


Top pillow view


I did not spend any money on this project because I had the fabric from before. If you were to buy fabric, a Yard should be around $5.00 or less.
Here I do not have instructions for pillow case. If any of you are interested please let me know.

I am linking this post to:


    craft Making


Thursday, May 19, 2011

Crepe Paper Pomander

I have seen this cool tutorial of crepe paper pomander at jessajill.blogspot.com. Due to her explanotry tutorial I thought of making one myself. I could not get to it instantly, but finally yesterday I made one.


Side View


Front View


Another Side View

This cutee is a little time consuming to put together but with enough determination it can be done. To see the full tutorial please click on the link bellow. Hope you will have fun making one........

Tuesday, May 17, 2011

My Made In America Find...


I found this supper cute vase in our local dollar store for $1.50. I loved its round shape instantly.


After unwrapping I was going to take off the product tag on its bottom. Then I saw "Made In USA." What a shock..........I used to think everything from dollar store are made in China. I was so happy....... couldn't resist myself from showing it to everyone....I called a few people too...LoL


To transform this supper cutttttttte vase I had to think little differently. I had long stemmed sunflower, and few paper roses. It was a tough choice...... I took the sunflower off of its stem and put just the flower inside the vase.


This is how it looks!!!

Another View........I just love it.

Total cost: $1.50 for the vase and I had the flower from before.


I am linking this post to the parties bellow: 


Tuesday, May 10, 2011

Floor Lamp Makeover Under $10.00.....


 I fell in love with this Crate & Barrel floor lamp and wanted to buy immediately but its price $349.00 held me back. I looked for cheaper price but did not find great quality for $50. 


This is the lamp I have/had. It was bought from Walmart for $30 few years ago. It is old but in good condition. I do not like discarding functional lamps. There is almost always a way to recycle them for a new look. 


 This is the new look of the lamp same lamp. 

I made a final attempt to buy a new lamp at IKEA. I did not find a lamp there for my budget instate I came across this drum shape shade in white for about $7.00. My original lamp is antique color. The white shade did not look good with the antique lamp pole. So I decided to redo the shade with glossy antique color fabric.


I made these ruffles according to the circumference of the drum. They are a little more than 3 inch wide. I used a sewing machine to create the ruffles.


The white shade was was warped with the same fabric using a hot glue gun.


Then using a hot glue gun the ruffles were attached.


It looked like this after the shade was covered with ruffles.


These roses were attached ahead of time and was attached using hot glue.


This is the drum shade in cooling process after the roses were attached.


Finally, it looks  like this. I am very happy with the results. 
Those who are wondering ....... I only spend $8.00 ( $7.00 shade & $1.00 glue sticks). I had the fabric in hand, but if I had to buy it I would not spend more then $5.00. I used 1 and 1/2 yards of fabric. Originally I was ready to spend $50.00. I am so happy that I did not buy a new one.

Those who are wondering how I made the roses please look watch this video:

Leave me a comment..... I would love to know what you think. Feel free to ask me questions.....

I am linking to:

http://www.thegirlcreative.com/search/label/Just%20Something%20I%20Whipped%20Up
Cherished Bliss UndertheTableandDreaming  
The Girl Creative